Use Visual Studio Code (VS Code) as your development environment. It’s free and works on all major platforms.
https://developer.android.com/studio
Here we using VS Code because the instructions default to VS Code-specific shortcuts. It’s easier to say things like “click here” or “press this key” instead of something like “do the appropriate action in your editor to do X”.
Choose a development target
Flutter is a multi-platform toolkit. Your app can run on any of the following operating systems:
- iOS
- Android
- Windows
- macOS
- Linux
- web
However, it’s common practice to choose a single operating system for which you will primarily develop. This is your “development target”—the operating system that your app runs on during development.
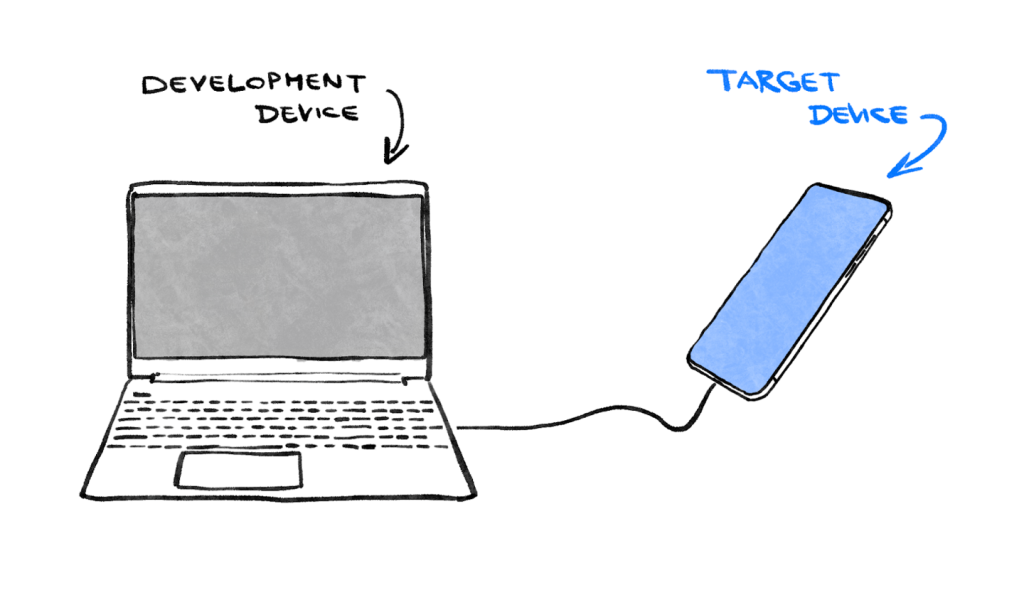
By using a Windows laptop to develop a Flutter app. If you choose Android as your development target, you typically attach an Android device to your Windows laptop with a USB cable, and your app-in-development runs on that attached Android device. But you could also choose Windows as the development target, which means your app-in-development runs as a Windows app alongside your editor.
It might be tempting to select the web as your development target. The downside of this choice is that you lose one of Flutter’s most useful development features: Stateful Hot Reload. Flutter can’t hot-reload web applications.
Make your choice now. Remember: You can always run your app on other operating systems later. It’s just that having a clear development target in mind makes the next step smoother.
Install Flutter
To get started with Flutter development, the official documentation at https://docs.flutter.dev./get-started/install provides the most up-to-date and comprehensive instructions for installing the Flutter SDK. These instructions go beyond merely installing the SDK and include details on setting up development target-related tools and editor plugins. By following these step-by-step guidelines, developers can ensure a smooth and hassle-free setup, enabling them to seamlessly create applications for mobile, web, and desktop platforms from a single codebase. The Flutter website’s instructions serve as an invaluable resource for beginners and experienced developers alike, ensuring they have all the necessary tools and configurations to embark on their Flutter journey successfully.
- Flutter SDK
- Visual Studio Code with the Flutter plugin
- The software required by your chosen development target (for example: Visual Studio to target Windows, or Xcode to target macOS)