Laravel Passport is a powerful package for handling OAuth2 authentication in Laravel applications. It allows you to authenticate API requests with secure access tokens. However, like any powerful tool, it can sometimes present challenges — one of which is the “Unable to read key from file” error. This error usually appears when Laravel is unable to access or read the private key required for token signing and validation.
In this blog, we’ll explore what causes this error, why it happens, and the steps you can take to fix it.
What Causes the “Unable to Read Key from File” Error?
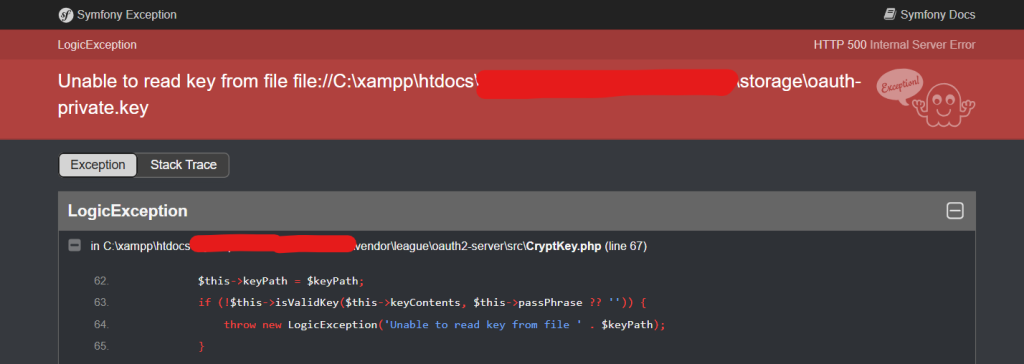
The error message typically looks like this:
Unable to read key from file file://C:\xampp\htdocs\myhospitalnow\mhn-admin-ms\storage\oauth-private.key
This error is often encountered when using Laravel Passport, which requires a pair of private and public keys (oauth-private.key and oauth-public.key) for token signing and verification. These keys are essential to secure authentication in OAuth2.
The message indicates that the private key file (oauth-private.key) either:
- Is missing.
- Corrupted.
- Has incorrect permissions, preventing Laravel from reading it.
Why Does This Happen?
Here are the most common reasons why this error occurs:
- Missing OAuth Keys: If the
oauth-private.keyandoauth-public.keyfiles are missing, Laravel Passport won’t be able to sign or verify tokens, resulting in the error. - File Permissions: Laravel may not have the necessary read/write permissions for the key files, especially on Linux or MacOS systems, or when using local development environments like XAMPP on Windows.
- Incorrect Path in Configuration: Laravel relies on specific paths for its key files, and if the path is misconfigured in the
.envfile or in your Laravel configuration files, Passport won’t be able to locate the keys. - Improper Installation or Configuration: If Passport hasn’t been correctly installed or configured, it could fail to generate the required key files.
Steps to Fix the Error
Let’s break down the steps you need to take to resolve this issue and ensure that Passport’s keys are properly set up.
1. Check if the Key Files Exist
The first step is to check whether the oauth-private.key and oauth-public.key files exist in the correct directory.
- Navigate to
C:\xampp\htdocs\myhospitalnow\mhn-admin-ms\storage\and confirm that both files are present.
If they’re missing, you’ll need to regenerate them. Proceed to the next step for instructions on how to do this.
2. Regenerate the OAuth Keys
If the key files are missing, you can easily regenerate them using a Laravel command. Laravel Passport requires two key files for secure token generation and verification:
oauth-private.key: The private key used to sign the access tokens.oauth-public.key: The public key used to verify the tokens.
To regenerate the keys, run the following Artisan command:
php artisan passport:keys
This will generate the required keys and place them in the storage/oauth-keys/ directory.
3. Set Correct Permissions for the storage Folder
If the key files are present but Laravel still can’t access them, the issue might be with file permissions.
For Linux/MacOS:
You can set the correct permissions for the storage folder using the following commands:
This ensures that the web server user has read and write access to the storage folder and its contents.
For Windows (XAMPP):
- Right-click on the
storagefolder. - Click Properties > Security.
- Ensure the user account running XAMPP (e.g.,
Everyone,IUSR, orIIS_IUSRS) has read and write permissions for the folder.
4. Verify Path Configuration in .env File
Make sure the path to the key files is properly configured in your .env file. Laravel Passport uses the environment variables to locate the keys.
Your .env file should include these lines (with the correct file paths):
PASSPORT_PRIVATE_KEY_PATH=/path/to/oauth-private.key
PASSPORT_PUBLIC_KEY_PATH=/path/to/oauth-public.key
5. Clear Config Cache
Whenever you make changes to the .env file or configurations, it’s essential to clear the configuration cache so that Laravel can pick up the latest settings.
To do this, run the following command:
php artisan config:cache
This ensures that the updated .env configuration is loaded properly.
6. Restart Your Laravel Server
After following all the above steps, restart your Laravel development server:
php artisan serve