XAMPP is a popular software package used for web development and testing purposes, which includes Apache, MySQL, PHP, and other tools. If you’ve been using XAMPP for your development projects and need to change the database password, this guide will walk you through the process step by step. Whether you’re enhancing security or updating your database credentials, changing the password is a straightforward task.
Prerequisites
Before you begin, make sure you have XAMPP installed on your system. You’ll also need access to the XAMPP control panel and a web browser.
Step 1: Open the XAMPP Control Panel
Start by launching the XAMPP control panel on your computer. You can typically find it in the installation directory of XAMPP or by searching for “XAMPP Control Panel” in your system’s search bar.
Step 2: Stop Apache and MySQL Services
In the XAMPP control panel, you’ll see a list of services like Apache, MySQL, and others. To change the database password, you should stop both the Apache and MySQL services. Click the “Stop” button next to each of these services.
Step 3: Access phpMyAdmin
Now that the services are stopped, open your web browser and enter the following URL: http://localhost/phpmyadmin/. This URL will take you to the phpMyAdmin interface, which is a web-based tool for managing MySQL databases.
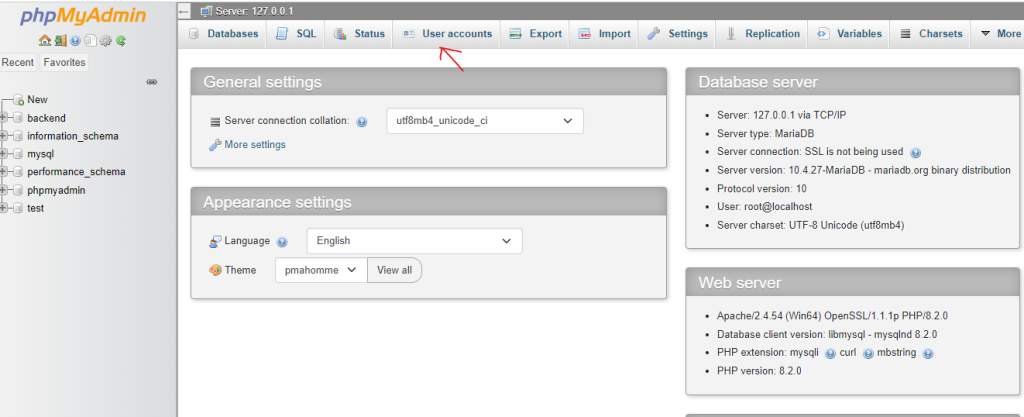
Step 4: Navigate to User Accounts
In the phpMyAdmin interface, click on the “User accounts” tab. This tab allows you to manage the user accounts and privileges for your MySQL server.
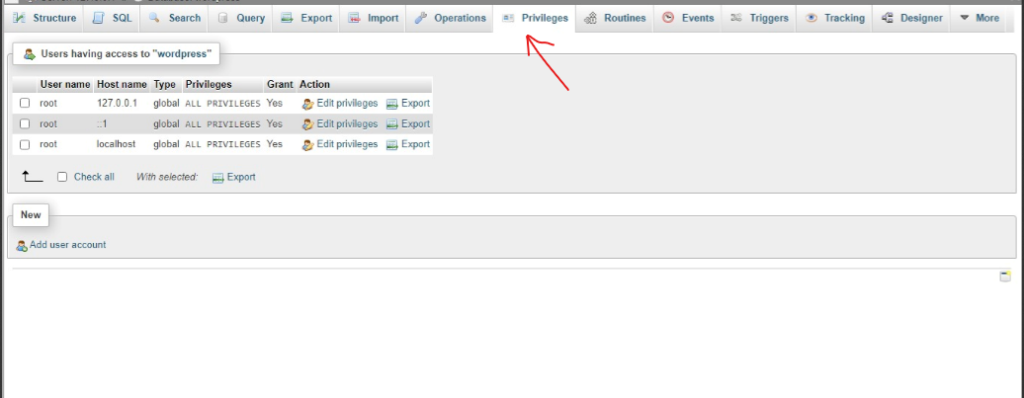
Step 5: Edit User Privileges
You’ll see a list of user accounts that have access to your MySQL server. Locate the user account for which you want to change the password and click on the “Edit privileges” link next to that account.
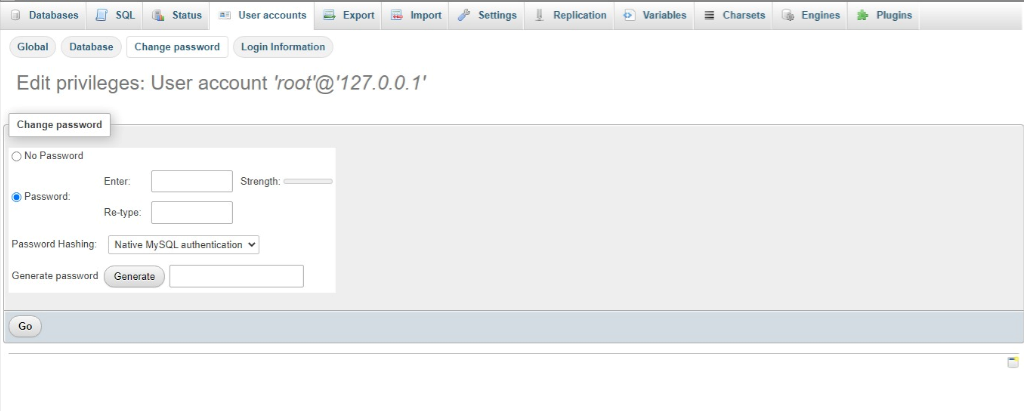
Step 6: Change Password
On the user privileges page, scroll down until you find the “Change password” section. Here, you can update the password for the selected user.
- Enter the new password in the “Password” field.
- In the drop-down menu next to the password field, select the appropriate option, such as “Password has been changed.”
Step 7: Save Changes
After entering the new password and selecting the appropriate option, click on the “Go” button at the bottom of the page. This action will save the changes and set the new password for the user account.
Step 8: Restart Services
Return to the XAMPP control panel and restart the Apache and MySQL services by clicking the “Start” button next to each of them. This ensures that your changes take effect.
[…] how-to-change-database-password-in-xampp-2 […]