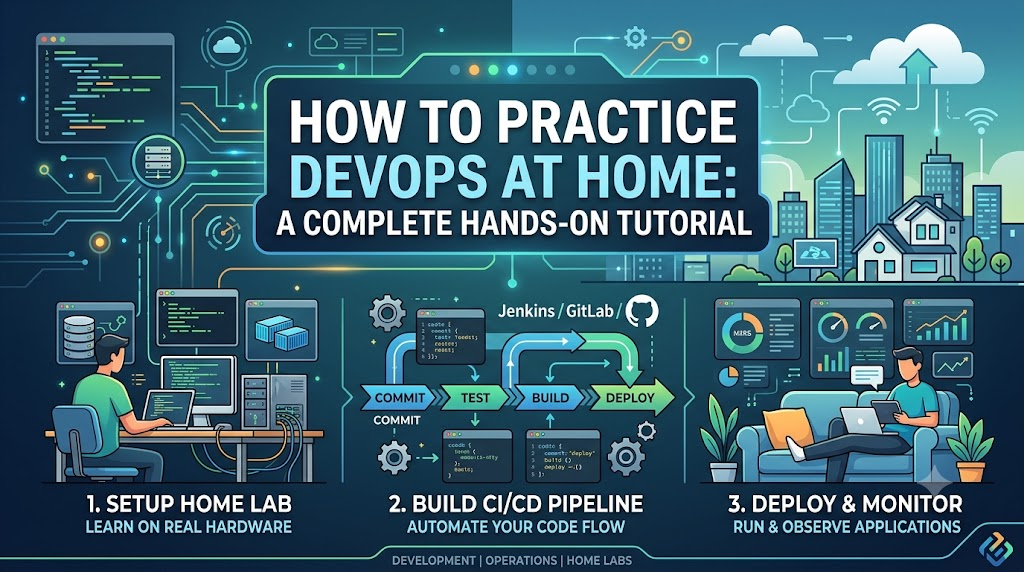
Learning DevOps is much easier when you stop treating it as a list of tools to memorize. You can watch tutorials about Git, Docker, Jenkins, Kubernetes, Terraform, Ansible, and cloud platforms for months. But until you build something, break it, fix it, automate it, and deploy it again, the knowledge usually remains theoretical.
The good news is that you do not need a company environment to practice DevOps. A reasonably capable laptop, an internet connection, and a willingness to experiment are enough to build a surprisingly realistic DevOps lab at home. This guide explains how to create that environment step by step, what projects to build, which tools to learn first, how to introduce CI/CD, infrastructure as code, containers, monitoring, and security, and how to know whether you are actually improving.
What Does It Mean to Practice DevOps at Home?
Practicing DevOps at home means creating a small software delivery environment where you can experience the same basic workflow used in professional engineering teams:
Plan → Code → Version Control → Build → Test → Package → Deploy → Monitor → Improve
For example, you might build a small web application and then:
- Store its source code in Git.
- Push the code to a Git repository.
- Automatically run tests.
- Build a Docker image.
- Scan the image for vulnerabilities.
- Push the image to a container registry.
- Deploy the application to a local Kubernetes cluster or cloud environment.
- Monitor the application.
- Create an alert when something goes wrong.
- Fix the problem and allow the pipeline to deploy the new version.
That single project can teach more practical DevOps than dozens of disconnected tutorials.
Why Practice DevOps at Home?
A home lab gives you something professional courses often cannot provide: freedom to experiment.
You can deliberately introduce failures without worrying about affecting production users.
You can:
- Break a deployment.
- Delete a container.
- Misconfigure a service.
- Create a failed pipeline.
- Rotate credentials.
- Roll back a release.
- Stop a monitoring service.
- Introduce a bad configuration.
- Restore a backup.
- Rebuild your environment from scratch.
This is where real learning happens.
DevOps is not simply knowing how to run docker build or write a Jenkinsfile. The more important skill is understanding how software moves from source code to a reliable running service and how to recover when that process fails.
What Do You Need to Start?
You do not need an expensive server.
A practical home DevOps lab can start with:
| Requirement | Practical Starting Point |
|---|---|
| Laptop/Desktop | 8 GB RAM minimum; 16 GB is much more comfortable |
| CPU | Modern multi-core processor |
| Storage | At least 50–100 GB free space |
| OS | Linux, macOS, or Windows with a Linux environment |
| Internet | Required for downloading tools, images and repositories |
| Git account | Useful for remote repositories |
| Cloud account | Optional initially |
| Editor | VS Code or another capable code editor |
| Terminal | Linux/macOS terminal or Windows Terminal |
If your machine has only 8 GB RAM, avoid running several heavyweight systems simultaneously. You can still learn most DevOps fundamentals, but you will need to be selective about what runs locally.
With 16 GB or more, running containers and a lightweight Kubernetes environment becomes considerably easier.
Step 1: Learn Linux Before Building a DevOps Lab
Linux is not a DevOps tool in the same way Git or Docker is, but Linux fundamentals make almost every other DevOps topic easier.
You should be comfortable with:
pwd
ls
cd
mkdir
cp
mv
rm
cat
less
grep
find
head
tail
Then move into permissions:
chmod
chown
Process management:
ps
top
kill
Networking:
curl
ss
ping
Package management will depend on your Linux distribution.
You should also understand:
- Files and directories
- Environment variables
- Processes
- Services
- Users and groups
- File permissions
- SSH
- Logs
- Networking basics
- DNS
- Ports
- Shell scripting
A Useful Exercise
Create a simple shell script that:
- Checks whether a web service is running.
- Tests whether a particular port is reachable.
- Writes the result to a log file.
- Returns a non-zero exit code when the check fails.
You have now created a tiny piece of operational automation.
Step 2: Make Git Your Daily Habit
Git should become part of everything you build.
Do not practice Git by memorizing commands alone. Use Git while working on an actual project.
Start with:
git init
git status
git add
git commit
git log
git diff
git branch
git switch
git merge
git pull
git push
Then learn:
- Branching strategies
- Pull requests
- Merge conflicts
- Tags
- Reverting changes
- Resetting changes
.gitignore- Commit hygiene
A simple home workflow could look like:
main
 ├── feature/login
 ├── feature/health-check
 └── feature/docker
Create a feature branch, make a change, test it, merge it, and tag a release.
For example:
git tag v1.0.0
git push origin v1.0.0
This starts introducing you to the idea of versioned software releases.
Step 3: Build a Small Application
You do not need to become a full-stack developer.
A simple application is enough.
For example:
Browser
   |
   v
Web Application
   |
   v
Database
The application could provide:
- A home page
- A health endpoint
- A simple API
- A database-backed operation
The language does not matter as much as the delivery workflow.
Python, Node.js, Java, Go, or another language can work.
The important thing is that you have something that can be:
built → tested → packaged → deployed
Step 4: Containerize the Application with Docker
Once your application works locally, containerize it.
A simple Docker workflow is:
docker build -t myapp:1.0 .
docker run -p 8080:8080 myapp:1.0
Then inspect what is happening:
docker ps
docker images
docker logs <container>
docker exec -it <container> sh
Do not stop at creating one Dockerfile.
Practice:
- Image creation
- Container lifecycle
- Port mapping
- Volumes
- Environment variables
- Networks
- Multi-container applications
- Docker Compose
- Image tagging
- Image cleanup
Step 5: Learn Docker Compose
A multi-service application is a much better DevOps exercise than a single container.
For example:
                Docker Network
                     |
       +-------------+-------------+
       |                           |
       v                           v
   Web App                     Database
       |
       v
    API Service
You can define the services in a Compose file and bring them up together.
Practice commands such as:
docker compose up -d
docker compose ps
docker compose logs
docker compose down
Then deliberately introduce problems.
For example:
- Stop the database.
- Change the database credentials.
- Use the wrong application port.
- Remove an environment variable.
- Restart the application.
Then diagnose the problem.
That troubleshooting experience is far more valuable than simply knowing the Compose syntax.
Step 6: Create Your First CI Pipeline
Now connect Git to automation.
The goal is simple:
Whenever code changes, automatically validate it.
A basic pipeline could be:
Git Push
   |
   v
Checkout Code
   |
   v
Install Dependencies
   |
   v
Run Tests
   |
   v
Build Application
   |
   v
Build Docker Image
At this stage, you can use a hosted CI platform or run Jenkins locally.
The exact platform matters less than understanding the pipeline concepts.
Learn:
- Pipeline stages
- Jobs
- Agents/runners
- Environment variables
- Artifacts
- Build failures
- Logs
- Secrets
- Branch-based workflows
- Pull-request validation
Your First CI Rule
Do not create a pipeline that always succeeds.
A useful pipeline should be capable of failing.
For example, intentionally introduce a failing test:
Developer pushes code
        ↓
Automated test fails
        ↓
Pipeline stops
        ↓
Developer investigates
        ↓
Fix is committed
        ↓
Pipeline runs again
        ↓
Build succeeds
This is the basic feedback loop behind CI.
Step 7: Add Automated Testing
DevOps without testing quickly becomes automation without confidence.
Start with a few meaningful tests.
For example:
Unit Tests
    ↓
Integration Tests
    ↓
Build
You do not need hundreds of tests in a home project.
Instead, learn the difference between:
- Unit testing
- Integration testing
- API testing
- Smoke testing
- End-to-end testing
Then configure the pipeline to stop when critical tests fail.
The objective is not maximum test count.
The objective is fast and reliable feedback.
Step 8: Learn Infrastructure as Code with Terraform
Once you understand application delivery, start managing infrastructure through code.
Terraform is a useful tool for learning Infrastructure as Code.
Instead of manually creating infrastructure, describe the desired state in configuration.
Conceptually:
Terraform Configuration
        |
        v
Terraform Plan
        |
        v
Review Changes
        |
        v
Terraform Apply
        |
        v
Infrastructure
Start with simple resources.
Do not immediately attempt to build a complicated production-grade cloud architecture.
Practice the fundamentals:
terraform init
terraform plan
terraform apply
terraform destroy
Learn:
- Providers
- Resources
- Variables
- Outputs
- Modules
- State
- Remote state concepts
- Dependency management
- Plan vs apply
- Drift
A Very Important Home-Lab Exercise
Create infrastructure.
Destroy it.
Then recreate it from your Terraform code.
If you can rebuild the environment without manually remembering dozens of steps, you are beginning to understand Infrastructure as Code.
Step 9: Learn Configuration Management with Ansible
Terraform and Ansible solve different problems.
A simplified distinction is:
Terraform: What infrastructure should exist?
Ansible: How should systems be configured?
For example:
Terraform
    ↓
Create VM
    ↓
Ansible
    ↓
Install Nginx
    ↓
Configure Nginx
    ↓
Deploy application
Practice Ansible by configuring a Linux machine automatically.
Your playbook might:
- Install a package.
- Create a user.
- Create a directory.
- Copy a configuration file.
- Start a service.
- Verify that the service is running.
Then destroy the machine and repeat the process.
This teaches repeatability, which is one of the central ideas of DevOps.
Step 10: Build a Local Kubernetes Lab
Do not rush into Kubernetes simply because it appears in almost every DevOps job description.
First understand:
- Containers
- Images
- Networking
- Volumes
- Services
- Configuration
- Deployment concepts
Then move to Kubernetes.
For home practice, lightweight local Kubernetes environments can be useful.
Your first application might look like:
                 Kubernetes Cluster
                        |
                 +------+------+
                 |             |
              Service       Deployment
                               |
                         +-----+-----+
                         |           |
                       Pod          Pod
                         |
                      Container
Learn the fundamentals:
- Pods
- Deployments
- Services
- ConfigMaps
- Secrets
- Namespaces
- Labels
- Selectors
- Probes
- Resource requests/limits
- Rolling updates
- Rollbacks
Useful commands include:
kubectl get pods
kubectl get deployments
kubectl get services
kubectl describe pod <pod>
kubectl logs <pod>
kubectl apply -f deployment.yaml
Step 11: Practice Kubernetes Failure Scenarios
This is where your Kubernetes practice becomes much more valuable.
Deploy an application and then intentionally create problems.
Scenario 1: Wrong Image
Change:
image: myapp:1.0to a tag that does not exist.
Then investigate why the Pod does not start.
Scenario 2: Wrong Port
Configure the application and Service with incompatible ports.
Then diagnose the connectivity problem.
Scenario 3: Failed Health Check
Configure an incorrect readiness or liveness probe.
Observe how Kubernetes behaves.
Scenario 4: Resource Limits
Give the application unrealistic resource constraints and observe the result.
The goal is not simply to make the application run.
The goal is to understand why it stopped running.
Step 12: Add Monitoring and Observability
An application that works on your laptop is not necessarily an application you can operate.
Start learning observability through three broad areas:
Metrics
Examples:
- CPU usage
- Memory usage
- Request count
- Error rate
- Request latency
Logs
Learn how to answer:
What happened?
Traces
Learn how to answer:
Where did the request spend its time?
A simple observability flow is:
Application
   |
   +---- Logs ----> Log System
   |
   +---- Metrics -> Metrics System
   |
   +---- Traces --> Tracing System
For a home lab, you can gradually experiment with tools such as Prometheus and Grafana rather than installing an entire observability stack on day one.
Step 13: Learn Alerts, Not Just Dashboards
Many beginners build attractive dashboards and stop there.
Operationally, the more important question is:
What happens when nobody is looking at the dashboard?
Create a few meaningful alerts.
For example:
Error rate > threshold
        ↓
Alert
        ↓
Investigate logs
        ↓
Identify cause
        ↓
Fix
        ↓
Verify recovery
Avoid creating alerts for every possible metric.
A useful alert should indicate that someone may need to take action.
Step 14: Introduce DevSecOps
Security should not be treated as a final step after deployment.
Add security checks to the pipeline.
For example:
Code
 ↓
Tests
 ↓
Dependency Scan
 ↓
Container Scan
 ↓
Build
 ↓
Deploy
Practice:
- Secret management
- Dependency scanning
- Container image scanning
- Least-privilege permissions
- Secure environment variables
- SSH key management
- Basic network security
- Dependency updates
Never Do This
Do not commit passwords, API keys, cloud credentials, or private keys into Git.
Even in a home project.
Bad:
DB_PASSWORD=MyRealPasswordinside a tracked configuration file.
Instead, learn how secrets are supplied securely through your development and deployment environment.
Step 15: Add a Cloud Environment
Once you understand the local workflow, introduce the cloud.
You do not need to immediately create a large environment.
Start small.
For example:
Git Repository
      |
      v
CI Pipeline
      |
      v
Docker Image
      |
      v
Container Registry
      |
      v
Cloud Environment
      |
      v
Running Application
Use infrastructure as code where practical.
Keep an eye on cost.
A home lab is supposed to teach you DevOps, not teach you how to accidentally generate a large cloud bill.
Use budgets, limits, cleanup routines, and resource reviews.
Step 16: Build a Complete DevOps Project
This is the most important part.
Do not learn every tool independently forever.
Bring the pieces together.
A strong home project could look like this:
                 Developer
                     |
                     v
                Git Repository
                     |
                     v
                 CI Pipeline
                     |
          +----------+----------+
          |                     |
       Tests                Security Scan
          |                     |
          +----------+----------+
                     |
                     v
              Docker Build
                     |
                     v
             Container Registry
                     |
                     v
             Deployment System
                     |
                     v
                Kubernetes
                     |
              +------+------+
              |             |
             App          Database
              |
              v
        Observability
       /       |       \
    Logs    Metrics   Traces
Terraform can manage the infrastructure around the environment.
Ansible can configure suitable hosts where configuration management is needed.
A Practical Home DevOps Project
Here is a project that can take you from beginner to a reasonably strong hands-on level.
Project: Automated Web Application Platform
Build a small web application with an API and database.
Phase 1 — Application
Create:
- Web application
- API
- Database
- Health endpoint
Phase 2 — Git
Put everything into Git.
Use:
- Feature branches
- Pull requests
- Meaningful commits
- Version tags
Phase 3 — Docker
Create:
- Application Dockerfile
- Database container
- Docker Compose configuration
Phase 4 — CI
Automate:
- Dependency installation
- Tests
- Linting
- Docker build
Phase 5 — Security
Add:
- Dependency scanning
- Container scanning
- Secret handling
Phase 6 — Infrastructure
Use Terraform to create your infrastructure.
Phase 7 — Configuration
Use Ansible where configuration management is appropriate.
Phase 8 — Kubernetes
Deploy the application to a local or cloud Kubernetes environment.
Phase 9 — Observability
Add:
- Metrics
- Logs
- Dashboards
- Alerts
Phase 10 — Failure Testing
Break the system intentionally.
Examples:
- Wrong image
- Broken configuration
- Failed dependency
- Database unavailable
- Incorrect Service port
- Failed deployment
- Resource exhaustion
Then document how you diagnosed and fixed each problem.
That documentation becomes valuable evidence of practical DevOps ability.
A 12-Week DevOps Home Practice Plan
You do not need to learn everything at once.
A structured progression works better.
| Week | Focus | Practical Goal |
|---|---|---|
| 1 | Linux | Build a Linux-based working environment |
| 2 | Git | Manage a project with branches and releases |
| 3 | Application basics | Build a small deployable application |
| 4 | Docker | Containerize the application |
| 5 | Docker Compose | Run multiple services |
| 6 | CI/CD | Automate tests and builds |
| 7 | Terraform | Provision infrastructure as code |
| 8 | Ansible | Automate system configuration |
| 9 | Kubernetes | Deploy the application locally |
| 10 | Monitoring | Add metrics and dashboards |
| 11 | Security | Add scanning and secure secrets handling |
| 12 | Capstone | Connect the complete workflow |
The schedule is flexible. Some topics will take longer than others.
The important thing is that every week should produce something you can actually run.
How Much Time Should You Practice Each Day?
Consistency matters more than long study sessions.
A useful routine is:
30 Minutes
Good for:
- Reading documentation
- Reviewing commands
- Learning concepts
60 Minutes
Good for:
- Learning a concept
- Implementing it
- Testing the result
90–120 Minutes
Ideal when building a serious lab project.
A simple session could be:
15 min  → Learn
45 min  → Build
20 min  → Break/fix
10 min  → Document
That final documentation step is easy to skip, but it is worth doing.
Write down:
- What you changed
- Why you changed it
- What failed
- How you diagnosed it
- How you fixed it
- What you would do differently
Practice Troubleshooting Instead of Only Practicing Setup
One of the biggest mistakes in DevOps learning is spending all your time building things that work.
Production systems do not stay perfect.
You should deliberately practice troubleshooting.
Create scenarios such as:
| Problem | What You Should Investigate |
|---|---|
| Application unavailable | Process, container, service, network |
| Container exits | Logs, command, environment |
| Pipeline fails | Job logs, dependencies, credentials |
| Deployment fails | Manifest, image, permissions |
| Database unreachable | DNS, port, credentials, service |
| High latency | Application, database, resources |
| Pod keeps restarting | Logs, probes, resources |
| Terraform fails | Configuration, provider, state |
| Server configuration drifts | Desired vs actual state |
A useful troubleshooting habit is:
Observe → Form a hypothesis → Test it → Fix → Verify
Do not randomly change five things at once.
Learn to Read Logs
A DevOps engineer spends a lot of time looking at evidence.
Practice commands such as:
tail -f application.logand container/Kubernetes logging commands.
When something fails, ask:
- When did the problem begin?
- What changed immediately before it?
- Is the failure reproducible?
- Which component failed first?
- Is this a symptom or the root cause?
- What evidence supports the hypothesis?
- Did the fix actually resolve the underlying issue?
This mindset is more valuable than memorizing another tool.
Practice Rollbacks
Deployment is only half of release management.
Recovery matters too.
For example:
Version 1
   ↓
Deploy
   ↓
Version 2
   ↓
Error rate increases
   ↓
Rollback
   ↓
Version 1
   ↓
Verify recovery
Practice:
- Application version rollback
- Container image rollback
- Kubernetes rollout rollback
- Git revert
- Configuration rollback
You should know not only how to deploy a new version, but also how to get back to a known-good version.
Practice Backups and Recovery
A system is not truly operationally mature if you only know how to create it.
Practice:
Backup → Delete → Restore → Verify
For your database project:
- Create sample data.
- Take a backup.
- Delete or simulate losing the database.
- Restore the backup.
- Verify the data.
- Document the recovery procedure.
This introduces an important operational lesson:
A backup that has never been restored is an assumption, not proof of recoverability.
Keep Your Home Lab Secure
Your home lab is a learning environment, but that does not mean security can be ignored.
Avoid exposing unnecessary services directly to the public internet.
Use:
- Strong authentication
- SSH keys
- Least privilege
- Firewall rules
- Secure secrets handling
- Regular updates
- Minimal exposed ports
- Separate credentials for different environments
Never use production credentials for experiments.
If you use cloud infrastructure, delete resources you no longer need.
What Not to Do
1. Do Not Learn 20 Tools at Once
Knowing the names of 20 DevOps tools is not the same as knowing DevOps.
It is better to understand:
Git + Docker + CI/CD + Terraform + Kubernetes + Monitoring
reasonably well than to know the basic syntax of 20 unrelated tools.
2. Do Not Copy Tutorials Blindly
If a tutorial says:
commanddo not simply copy and paste it.
Ask:
- What does this command do?
- Why is it required?
- What changes if I remove it?
- What permissions does it require?
- Where does its output go?
That habit builds real understanding.
3. Do Not Start with Kubernetes
Kubernetes is powerful, but starting there often creates unnecessary confusion.
A better progression is:
Linux
  ↓
Git
  ↓
Application
  ↓
Docker
  ↓
CI/CD
  ↓
Infrastructure as Code
  ↓
Kubernetes
  ↓
Observability
The exact sequence can vary, but the dependencies between concepts matter.
4. Do Not Chase Certifications Before Building
Certifications can help structure learning and demonstrate knowledge, but they cannot replace hands-on experience.
If you are preparing for a DevOps certification, connect every major topic to a lab.
For example:
Learning Docker → Build a container
Learning Terraform → Provision something
Learning Kubernetes → Deploy something
Learning CI/CD → Automate something
How to Know You Are Actually Improving
Do not measure progress by the number of tutorials completed.
Measure it by what you can build and troubleshoot.
You are progressing when you can:
- Create a Git repository without a tutorial.
- Write a basic Dockerfile.
- Explain why a container failed.
- Build a CI pipeline.
- Understand a failed pipeline from its logs.
- Provision infrastructure with code.
- Deploy an application to Kubernetes.
- Diagnose a failed Pod.
- Read application and infrastructure logs.
- Create useful monitoring.
- Roll back a bad release.
- Restore a database backup.
- Explain how secrets are handled.
- Rebuild your environment from documented steps.
The strongest test is this:
Can you start with an empty environment and reproduce the system?
If the answer is yes, you are moving beyond tool familiarity toward real DevOps capability.
Build a DevOps Portfolio from Your Home Lab
Your home projects can become portfolio material.
For each project, document:
1. Problem
What were you trying to build?
2. Architecture
How do the components communicate?
3. Tools
Why did you choose the tools?
4. Automation
What did you automate?
5. Security
How did you handle credentials and access?
6. Monitoring
How do you know the system is healthy?
7. Failure Testing
What did you intentionally break?
8. Recovery
How did you recover?
9. Lessons Learned
What would you change in the next version?
This is much stronger than a resume that simply says:
“Worked with Docker, Jenkins, Kubernetes and Terraform.”
A documented project gives those technologies context.
A Simple DevOps Home Lab Roadmap
If you want the shortest practical roadmap, follow this:
                     DEVOPS HOME LAB

                           |
                           v
                        Linux
                           |
                           v
                          Git
                           |
                           v
                    Build Application
                           |
                           v
                         Docker
                           |
                           v
                    Docker Compose
                           |
                           v
                         CI/CD
                           |
                           v
                       Terraform
                           |
                           v
                        Ansible
                           |
                           v
                       Kubernetes
                           |
                           v
                    Observability
                           |
                           v
                       Security
                           |
                           v
                    Cloud Deployment
                           |
                           v
                  Failure & Recovery
Do not move forward simply because you finished reading about a technology.
Move forward when you can use it, explain it, troubleshoot it, and rebuild it.
Final Checklist
Before considering your home DevOps lab complete, check whether you can answer “yes” to these questions:
Fundamentals
- Can I work comfortably in Linux?
- Do I understand basic networking?
- Can I use Git confidently?
- Can I troubleshoot from logs?
Containers
- Can I create a Docker image?
- Can I run and inspect containers?
- Can I manage multiple services?
CI/CD
- Can I create a basic pipeline?
- Does the pipeline run tests?
- Does it build an artifact or image?
- Can I diagnose a failed pipeline?
Infrastructure
- Can I provision infrastructure using code?
- Do I understand Terraform state?
- Can I reproduce an environment?
Configuration
- Can I automate server configuration?
- Can I make configuration repeatable?
Kubernetes
- Can I deploy an application?
- Do I understand Pods, Deployments and Services?
- Can I troubleshoot a failed Pod?
- Can I perform a rollback?
Observability
- Can I collect useful metrics?
- Can I inspect logs?
- Can I create meaningful alerts?
Security
- Are secrets kept out of source control?
- Do I understand least privilege?
- Can I identify basic container/dependency risks?
Operations
- Can I perform a rollback?
- Can I restore a backup?
- Can I reproduce my environment?
- Have I deliberately tested failure scenarios?
Final Recommendation
The best way to practice DevOps at home is not to install every popular DevOps tool. Build one small application and take responsibility for its entire lifecycle.
Start with Git. Containerize the application. Automate testing. Build a CI/CD pipeline. Introduce Infrastructure as Code. Deploy it. Add monitoring. Secure the pipeline. Break the system deliberately. Troubleshoot it. Roll it back. Restore it. Then rebuild the whole environment from scratch.
That progression teaches the real DevOps skill: creating a repeatable, observable, secure, and recoverable path from code to a running service.
If you can repeatedly build, deploy, break, diagnose, recover, and improve your own system, you are no longer just studying DevOps—you are practicing it.
