Importing an SQL file through the command line is a useful skill when working with MySQL databases. Whether you’re migrating data, setting up a fresh database, or restoring a backup, the command line method is quick and effective. This guide will walk you through the process of importing an SQL file into a MySQL database using the Command Prompt (CMD).
Prerequisites:
- MySQL installed: Ensure that MySQL is installed on your machine. If you are using a local development environment like XAMPP or WAMP, MySQL will already be included.
- Access to MySQL: You must have access to MySQL with sufficient privileges (i.e., a user with the right to import data).
- SQL file: The SQL file that you want to import should be available on your system.
Step-by-Step Guide to Import SQL File:
Step 1: Open Command Prompt
First, open the Command Prompt on your system.
- On Windows: Press
Windows + R, typecmd, and hit Enter. - On macOS/Linux: Open the Terminal application.
Step 2: Navigate to MySQL Bin Directory
To interact with MySQL, you need to navigate to the bin directory of MySQL. This is where the mysql command-line tool is located.
For example, if you’re using XAMPP, the MySQL bin directory is located at:
cd C:\xampp\mysql\bin
If you have a different MySQL installation, the path might be different, so adjust accordingly.
Step 3: Log into MySQL
Now that you are in the MySQL bin directory, log into MySQL using the mysql command. You will need your MySQL username and password.
Run the following command:
mysql -u root -p
Here:
-u root: Specifies the username (in this case,root).-p: Prompts you for the MySQL password.
After entering your password, you will be logged into the MySQL shell.
Step 4: Create or Select a Database
Before importing the SQL file, ensure you’re in the correct database. You can either select an existing database or create a new one.
- To select an existing database:
USE database_name;
Replace database_name with the name of your database.
To create a new database (if it doesn’t already exist):
CREATE DATABASE database_name;
Then, use the USE command to switch to the new database:
USE database_name;
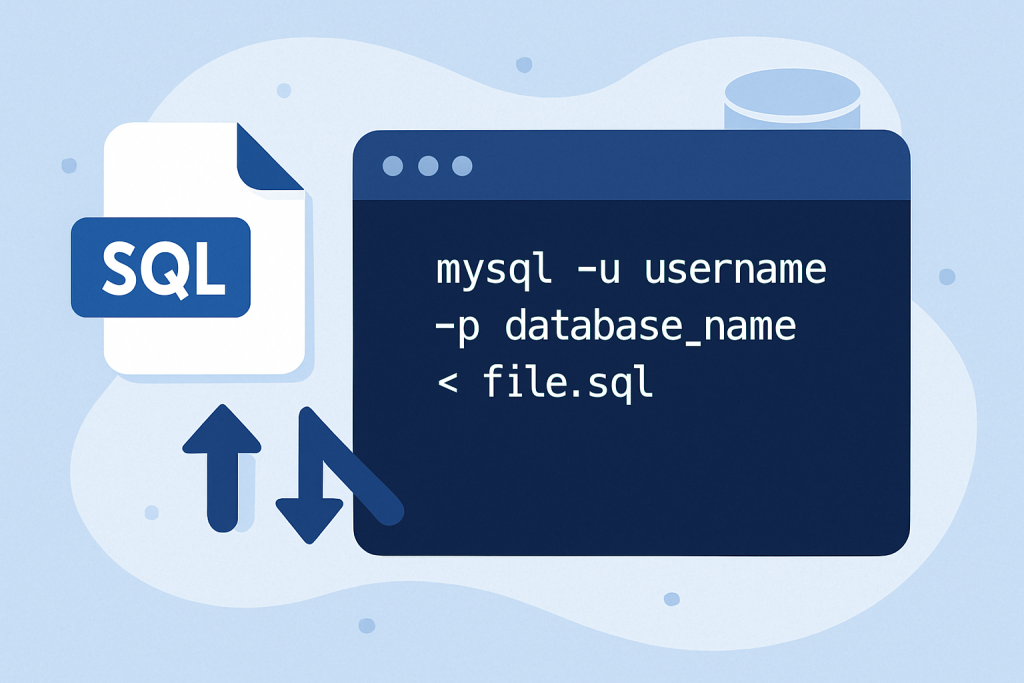
Step 5: Import the SQL File
Now that you’re in the correct database, it’s time to import the SQL file.
- Exit MySQL shell by typing
exitand hitting Enter. - Return to the Command Prompt (if you’ve exited MySQL shell) and use the
mysqlcommand to import the SQL file directly.
Run the following command:
mysql -u root -p database_name < "C:\path\to\your\file.sql"
Where:
-u root: MySQL username (replacerootif you’re using a different username).-p: Prompts you to enter your password.database_name: The name of the database you want to import the SQL file into."C:\path\to\your\file.sql": The full path to your SQL file. Use forward slashes or double-backslashes for Windows paths.
Step 6: Verify the Import
Once the import is complete, you can verify that the tables have been imported correctly:
- Log back into MySQL:
mysql -u root -p
Select the database:
USE database_name;
Show the imported tables:
SHOW TABLES;
- This will display all the tables that were imported from the SQL file.
Troubleshooting:
- Invalid File Path: If you receive an error regarding the file path, ensure the path to your SQL file is correct and uses the right slashes. On Windows, use double-backslashes (
\\) or forward slashes (/). - Database Already Exists: If you are trying to import an SQL file into an existing database and it already has tables, ensure you’re not overwriting or conflicting with any existing data.
- Permissions: If you encounter permission errors, ensure your MySQL user has the correct privileges to import data.