Windows 11, the latest operating system from Microsoft, brings with it a host of features and improvements. One essential skill for users is the ability to manage their storage effectively, and creating a partition is a key aspect of that. we will guide you through the process of making a partition in Windows 11 from the C drive using the built-in Disk Management tool.

Step 1: Access Disk Management
To begin, press the Win + X keys simultaneously to open the power user menu. From there, select “Disk Management.” This will launch the Disk Management tool, where you can view and manage your system’s drives and partitions.
Step 2: Shrink the C Drive
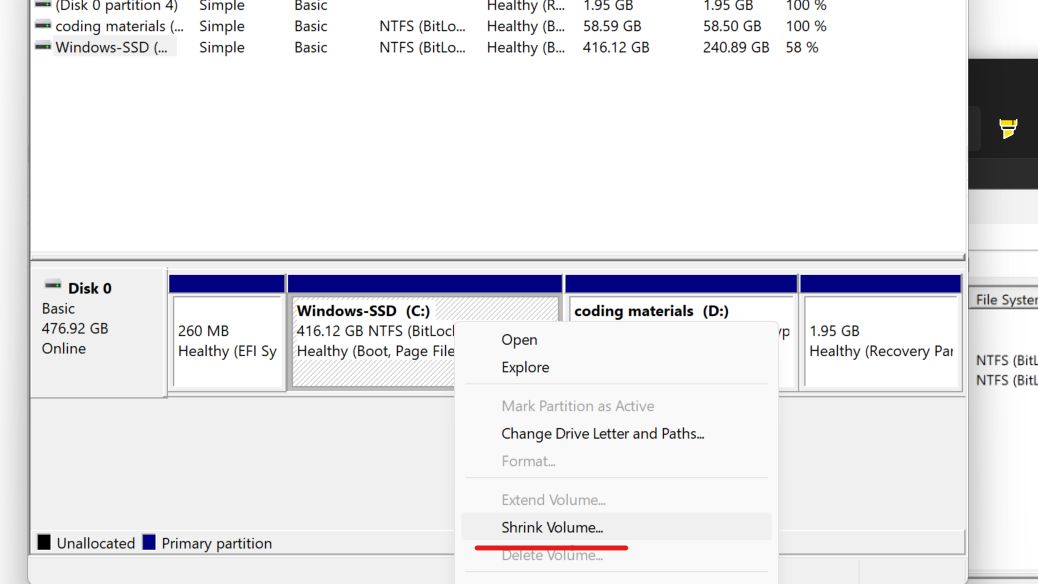
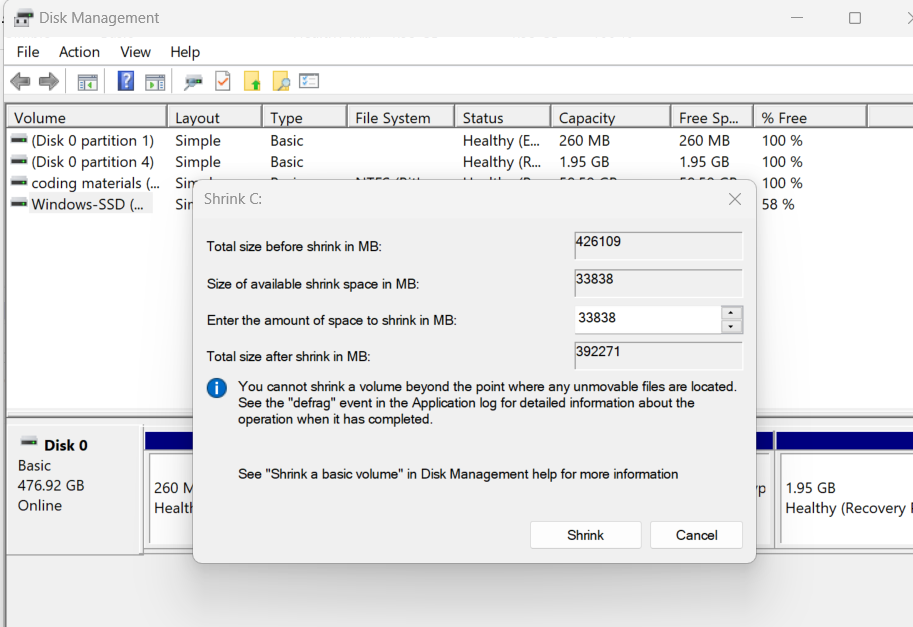
Locate your C drive in the Disk Management window, right-click on it, and choose “Shrink Volume.” In the window that appears, enter the amount of space you want to allocate for the new partition. Keep in mind that this value is in megabytes, so adjust accordingly. Click “Shrink” to initiate the process.
Step 3: Create a New Partition
Once the shrinking process is complete, you will see unallocated space next to the C drive. Right-click on the unallocated space and select “New Simple Volume.” This will open the New Simple Volume Wizard.
Step 4: Configure the New Partition
Follow the wizard’s prompts to configure the new partition. Specify the size for the partition (usually the same as the space you shrunk from the C drive). Choose a drive letter or accept the default one. Assign a meaningful volume label and select the file system (typically NTFS). Opt for a quick format and review your choices before clicking “Finish.”
Step 5: Finalize the Process
You will be prompted with a warning about converting the disk to a dynamic disk. Confirm by clicking “Yes.” The new partition will now be created, and you can observe it in the Disk Management window.
[…] How to make a partition in Windows 11 from C drive […]
[…] How to make a partition in Windows 11 from C drive […]
[…] How to make a partition in Windows 11 from C drive […]
[…] How to make a partition in Windows 11 from C drive […]
[…] How to make a partition in Windows 11 from C drive […]